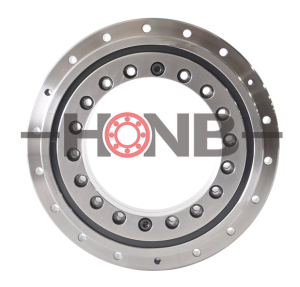
Detection and adjustment method of bearing clearance
Author: hongyuanTime:
With the development of industrialization, bearings are used more and more widely in various equipment. Among them, the adjustment and measurement of bearing clearance and the method of bearing installation are very important aspects in the use of bearings. This article focuses on some detection and adjustment methods related to bearing clearance.
1Bearing clearance
There is a certain gap between the inner and outer rings of rolling bearings and the rolling elements, so there can be relative displacement between the inner and outer rings. When there is no load, one ring is stationary, and the amount of movement of the other ring from one limit position to the other along the radial and axial directions of the bearing is called radial clearance and axial clearance respectively. .
According to the state of the bearing, the clearance is divided into three types.
(1) Original clearance. Refers to the clearance in the free state of the rolling bearing before installation. It is determined by the processing and assembly of the manufacturer.
(2) Installation clearance, also called matching clearance. It is the clearance when the bearing, shaft and bearing seat are installed but not yet working. Due to interference installation, either the inner ring is enlarged, the outer ring is reduced, or both, the installation clearance is smaller than the original clearance.
(3) Working clearance. The clearance of the rolling bearing in the working state. When the inner ring is working, the temperature rise is the largest and the thermal expansion is the largest, which reduces the bearing clearance. At the same time, due to the action of the load, elastic deformation occurs at the contact point between the rolling element and the raceway, which increases the bearing clearance. , the working clearance of the bearing is larger or smaller than the installation clearance, depending on the combined effect of these two factors.
2 Hazards of improper bearing working clearance
Working clearance is an important quality indicator of rolling bearings and an important parameter in bearing applications. In actual use, the working clearance of the bearing will affect the load distribution, vibration, noise, friction torque and life of the bearing. Inappropriate working clearance of bearings can cause harm to the equipment.
(1) The working clearance of the bearing is too small.
If the working clearance of the bearing is too small, the friction torque of the bearing will be increased, thereby generating a large amount of heat, which may easily lead to thermal damage of the bearing. This is because when the working clearance of the bearing is too small, it will lead to poor lubrication between the rolling elements of the bearing and the inner and outer rings of the bearing. Dry friction will generate a lot of heat, resulting in wear, cementation, expansion and cracking of the inner and outer rings of the bearing, etc., which will cause Bearing damage.
(2) The working clearance of the bearing is too large.
The working clearance of the bearing is too large, which is mainly caused by the natural clearance of the bearing being too large and the pressing force of the bearing being insufficient. For example, in a high-speed reducer, when the natural clearance of the bearing is large, the working clearance will also be relatively large, which will cause the reducer to vibrate greatly during operation and reduce the service life of the bearing.
3. Measurement of bearing clearance
The main methods for measuring bearing clearance include special instrument measurement, simple measurement and feeler gauge measurement.
The feeler gauge measurement method is the most widely used on site and is suitable for measuring the radial clearance of large and extra-large cylindrical roller bearings. The bearing is measured when it is placed upright or flat. In case of dispute, the measured value when the bearing is flat shall prevail. .
The method for determining the maximum radial clearance and minimum radial clearance of the bearing: when measuring along the circumference of the roller and raceway with a feeler gauge, rotate the ring and roller cage assembly for one week, and then rotate the ring and roller cage assembly for three consecutive times. The maximum thickness of the feeler gauge piece that can pass through each roller is the measured value of the maximum radial clearance.
The minimum thickness of the feeler gauge piece that cannot pass on three consecutive rollers is the minimum radial clearance measurement value. Take the arithmetic mean of the maximum and minimum radial clearance measurements as the radial clearance value of the bearing. The clearance value measured using the feeler gauge method allows for errors including the thickness tolerance of the feeler gauge.
When the radial clearance of spherical roller bearings is measured using the feeler gauge measurement method, after the radial clearance value of each row is qualified, the arithmetic mean of the clearance values of the two rows is taken as the radial clearance value of the bearing.


We have rich experience in precision bearing manufacturing and are ranked NO.1 in China and NO.3 all over the world.
We can tailor the overall solution for the use of precision bearings.
HONB– Accountability & Innovation
Products
- YRT rotary table bearing
- YRTS rotary table bearing (high speed series)
- YRTM with integral angular measuring system series
- ZKLDF axial angular contact ball bearing series
- RA series crossed roller bearing
- SX series crossed roller bearing
- CRBH series crossed roller bearing
- RE series crossed roller bearing
- RU series crossed roller bearing
- RB series crossed roller bearing
- XR/JXR series crossed taper roller bearing
- Crossed roller bearing
Contact Us

✉️ bearing20@hyzcgroup.com
📞 +86 15236685001


